

How Throw Distance Affects Image Uniformity
Achieving a uniform and consistent image is one of the key goals when setting up a projector. Whether in classrooms, offices, home theaters, or collaborative workspaces, uniformity ensures that every part of the screen is equally bright, sharp, and visually appealing. One of the most critical factors affecting image uniformity is the projection throw distance. Knowing the short throw projector distance and understanding how far the projector should be from the screen allows for a balanced, distortion-free image. This knowledge is essential, especially when using projectors as an ultra wide monitor alternative or in spaces with unique layouts.
Understanding Image Uniformity
Image uniformity refers to how consistently an image displays across the entire screen. High uniformity means that brightness, color, and sharpness are consistent from edge to edge. Poor uniformity often results in hotspots, dim corners, or uneven focus, which can detract from the viewing experience. In business presentations, classrooms, or home theaters, uniform images ensure that viewers receive clear, legible, and immersive visuals.
The Role of Throw Distance
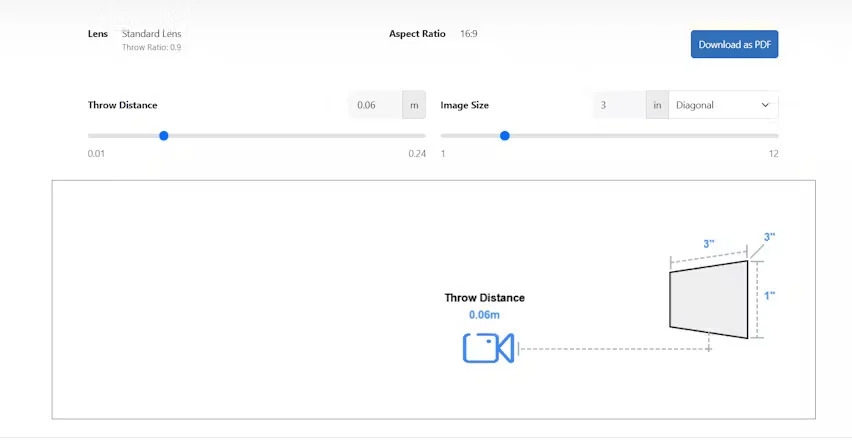
Projection throw distance is the space between the projector lens and the screen. The throw ratio defines the relationship between this distance and the width of the projected image:
Throw Ratio = Projection Throw Distance ÷ Image Width
For short throw projectors, this ratio allows large images to be projected from a minimal distance. Accurately calculating projection throw distance ensures that the image fills the screen properly while maintaining uniform brightness and focus. For example, a short throw projector with a 0.5:1 throw ratio projecting a 120-inch screen should be placed 0.5 × 120 = 60 inches from the screen. This precise placement is crucial for maintaining even illumination and avoiding dark or bright spots.
How Throw Distance Impacts Uniformity
-
Brightness Consistency
When the projector is too close to the screen, the center of the image may appear brighter than the edges, creating a hotspot effect. Conversely, placing the projector too far can make the edges appear brighter or the center dimmer, affecting uniformity. Maintaining the recommended short throw projector distance ensures even brightness across the screen. -
Focus and Sharpness
Incorrect throw distance can result in areas of the image being out of focus. Short throw projectors are designed to maintain clarity at a specific distance, so deviations can create blurred edges or uneven sharpness. -
Geometric Accuracy
Images projected from the wrong distance can appear stretched or compressed, reducing uniformity. Proper throw distance ensures that the projected image maintains its intended proportions. -
Screen Coverage
Correct projection throw distance ensures the image covers the intended screen fully, avoiding areas of overlap or blank spaces. This is especially important in ultra wide monitor setups where the projection spans a large horizontal area.
Steps to Optimize Image Uniformity
-
Measure Screen Dimensions
Determine the width and height of the projection surface. This measurement is essential for calculating accurate throw distance. -
Check the Projector’s Throw Ratio
Review the specifications to understand how far the projector should be placed from the screen for the desired image size. -
Calculate Projection Throw Distance
Use the formula:
Projection Throw Distance = Throw Ratio × Image Width
For short throw projectors, adhering to this calculation prevents brightness inconsistencies and distortion. -
Center the Projector
Align the projector with the screen’s horizontal and vertical center to ensure even coverage. Off-center placement can cause uneven illumination. -
Adjust Tilt and Lens Shift
Use lens shift and tilt adjustments to fine-tune focus and alignment. This helps correct minor deviations and ensures uniform sharpness across the screen. -
Test with a Uniform Image
Project a test pattern or a solid color to check for uniformity. Identify any hotspots, dim areas, or distortions and adjust placement or settings accordingly.
Tips for Maintaining Uniformity
-
Use short throw projectors in tight spaces: Reduces shadows and maintains even illumination.
-
Consider ambient light: Bright room lighting can exaggerate unevenness in image uniformity. Controlling light improves consistency.
-
Select the right screen material: Matte white or specialized projection surfaces enhance brightness uniformity.
-
Maintain projector alignment: Even slight shifts can cause uneven brightness or focus.
-
Optimize for ultra wide monitor applications: Accurate throw distance ensures large projections remain uniform, even across wide screens or walls.
Common Mistakes to Avoid
-
Placing the projector too close or too far, causing hotspots or dim corners
-
Mounting the projector off-center or at an incorrect angle
-
Ignoring lens shift or focus adjustments
-
Projecting onto an uneven or unsuitable surface
-
Neglecting ambient light control, which can amplify brightness inconsistencies
Benefits of Proper Throw Distance for Uniformity
-
Even brightness and color: Prevents distracting hotspots or dim areas on the screen.
-
Consistent sharpness: Ensures the entire image is in focus and readable.
-
Professional appearance: Uniform images enhance the quality of presentations and entertainment experiences.
-
Improved viewer engagement: Consistent visuals help viewers stay focused and understand content more effectively.
-
Versatility: Suitable for classrooms, boardrooms, home theaters, and ultra wide monitor alternatives.
Practical Example
In a conference room with a short throw projector and a 120-inch screen, the projector has a throw ratio of 0.5:1. Using the formula, the ideal projection throw distance is 0.5 × 120 = 60 inches. By mounting the projector at this distance, centering it, and adjusting lens shift and tilt, the projected image appears evenly bright and sharp from edge to edge. Participants can view charts, text, and images without strain, ensuring a professional and effective presentation.
Conclusion
Image uniformity is a critical factor for professional-quality projections, and throw distance plays a central role in achieving it. By calculating short throw projector distance and projection throw distance accurately, users can determine how far the projector should be from the screen to maintain even brightness, sharpness, and clarity.
Whether for home theaters, classrooms, offices, or ultra wide monitor alternatives, proper throw distance setup enhances viewer experience and creates visually appealing, distortion-free images. Accurate placement, careful alignment, and attention to focus and lens adjustments transform a projector setup into a high-performance display that delivers uniform, immersive, and professional-quality visuals.
Read more: https://ekonty.com/blogs/431483/How-to-Avoid-Image-Warp-from-Wrong-Throw-Distance
