

The Ultimate Guide to Installing a Ceiling Projector Mount in Your Bedroom
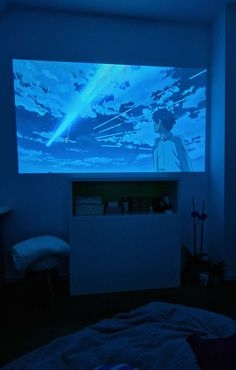
XTEN-AV is committed to helping AV enthusiasts create professional and efficient setups, whether in commercial spaces or at home. One of the most popular ways to upgrade a bedroom entertainment system is by installing a ceiling projector mount. Ceiling mounting not only saves space but also ensures optimal image alignment and a clean, professional look. If you are planning to setup a projector in your bedroom, understanding the installation process and best practices is crucial for a smooth and successful setup.
In this ultimate guide, we will walk you through the steps to install a ceiling projector mount in your bedroom. We will cover everything from choosing the right equipment to selecting the right projector screen for your bedroom, cable management, and fine-tuning the image for the best viewing experience.
Why Choose a Ceiling Projector Mount
A ceiling-mounted projector offers multiple benefits over placing it on a shelf or table:
-
Space Saving – Frees up floor and furniture space in the bedroom.
-
Optimal Viewing Angles – Ensures the projector is perfectly aligned with the screen for a sharp and balanced image.
-
Professional Look – Hides cables and creates a clean installation.
-
Permanent Setup – Reduces the need to reposition the projector for every use.
A ceiling projector mount is essential for a high-quality bedroom projector setup that feels more like a mini home theater.
Step 1. Choose the Right Projector
Before installing a projector in the bedroom, you need to select the best model for your space. Consider these factors:
-
Throw Distance – Check how far the projector needs to be from the screen to achieve the desired image size. Short throw projectors work well in small bedrooms.
-
Brightness – Bedrooms usually have lower ambient light, so a projector with 1500 to 2500 lumens is sufficient.
-
Resolution – Full HD or 4K ensures clear and sharp visuals for movies and gaming.
-
Noise Level – A quiet projector is important to avoid distractions during late-night viewing.
Choosing the right projector ensures that your bedroom projector setup delivers a high-quality viewing experience.
Step 2. Select a Ceiling Mount
The ceiling mount holds your projector securely and allows for proper alignment. Look for a mount that offers:
-
Compatibility – Matches your projector’s weight and mounting points.
-
Adjustability – Allows tilt, rotation, and extension for precise alignment.
-
Durability – Made from strong materials to support the projector over time.
A flexible mount makes installing a projector in the bedroom easier and helps you fine-tune the image after mounting.
Step 3. Choose the Right Spot on the Ceiling
Selecting the ideal ceiling spot is critical for optimal performance:
-
Center with Screen – The projector should be horizontally aligned with the center of the right projector screen for your bedroom.
-
Distance from Screen – Use the projector’s throw distance to determine how far from the screen it should be mounted.
-
Ceiling Height – Ensure it is high enough to avoid interference with furniture or movement in the room.
Mark the spot with a pencil to guide the installation. Proper placement ensures accurate alignment and a professional-looking setup.
Step 4. Prepare for Installation
Before drilling into the ceiling, take these precautions:
-
Use a stud finder to locate ceiling joists for secure mounting.
-
Gather all tools, including drill, screws, level, and screwdriver.
-
Plan your cable routing, including HDMI, power, and audio cables.
Proper preparation reduces errors and ensures a safer and more stable bedroom projector setup.
Step 5. Install the Ceiling Mount
Follow these steps to securely mount your projector:
-
Drill pilot holes into the ceiling joists at the marked location.
-
Attach the mounting bracket using screws and anchors.
-
Use a level to ensure the bracket is straight and secure.
-
Check that the mount can support the projector weight without wobbling.
A solid mount is essential for long-term stability and prevents the projector from shifting over time.
Step 6. Attach the Projector to the Mount
Once the mount is installed, carefully attach the projector according to the manufacturer’s instructions:
-
Securely fasten all screws to prevent movement.
-
Adjust the tilt, rotation, and zoom to align the projector with the screen.
-
Ensure the projector lens is pointing directly at the center of the screen.
Accurate attachment ensures that your image is clear and free of distortion, creating an ideal viewing experience.
Step 7. Manage Cables Neatly
Proper cable management keeps your bedroom projector setup clean and organized:
-
Route HDMI and power cables through the ceiling or along the wall using cable raceways.
-
Label cables for easy troubleshooting.
-
Avoid tight bends or tension on the cables to prevent damage.
Good cable management not only improves aesthetics but also makes future adjustments easier.
Step 8. Select the Right Projector Screen for Your Bedroom
The projector screen significantly impacts the viewing experience. A high-quality screen improves image sharpness, contrast, and color accuracy. Consider these options:
-
Fixed Frame Screens – Ideal for permanent installations.
-
Retractable Screens – Can be hidden when not in use.
-
Ambient Light Rejecting Screens – Useful if your room has natural light during the day.
Selecting the right projector screen for your bedroom ensures that your installation delivers the best visual performance.
Step 9. Fine-Tune the Image
After installation, power on the projector and adjust the image:
-
Focus and zoom the projector lens for sharpness.
-
Use keystone correction to eliminate distortion.
-
Check alignment with the screen and adjust the mount if necessary.
Taking the time to fine-tune the image guarantees an optimal viewing experience and a professional finish for your bedroom projector setup.
Step 10. Enjoy Your Bedroom Home Theater
With the ceiling mount installed and projector aligned, your bedroom is ready for movies, streaming, or gaming. A properly installed projector provides a cinematic experience without compromising space or room aesthetics.
Additional Tips
-
Clean the projector lens regularly to maintain image quality.
-
Use blackout curtains to enhance contrast and color accuracy.
-
Add a small soundbar or speaker system for immersive audio.
-
Periodically check the mount and cables to ensure safety and stability.
Conclusion
Installing a ceiling projector mount in your bedroom transforms your space into a personal home theater. By carefully selecting your projector, choosing the right mount, and planning your installation with proper cable management, you can achieve a clean and professional setup. Pairing the projector with the right projector screen for your bedroom enhances image quality and ensures an immersive viewing experience.
XTEN-AV emphasizes that careful planning and attention to detail are key to a successful bedroom projector setup. Following this ultimate guide, installing a projector in the bedroom becomes straightforward, safe, and rewarding, allowing you to enjoy high-quality cinematic entertainment from the comfort of your own space.
Read more: https://social.sktorrent.eu/read-blog/50416
