

How to Plan, Design, and make Your Own Play Area for kiddies
We all know that kiddies have bottomless energy, and occasionally it feels like the vicinity is just another place for them to run wild. But what if we could conduct that energy into commodity safe, fun, and, dare we say, creative? That's where erecting a DIY play structure comes in. Not only does it keep the little bones
entertained, but it also gives them a space to explore, climb, and imagine.
Step 1 Planning Your Play Area
Before we indeed pick up a hammer, the first step is planning. Take a look at your vicinity and ask yourself a many questions — how important space do we really have? Are there any tricky spots like uneven ground or pitches? And, importantly, how numerous kiddies are going to use this space at formerly? Mapping it out with a simple sketch helps, and trust me, this little step saves a lot of headaches latterly.
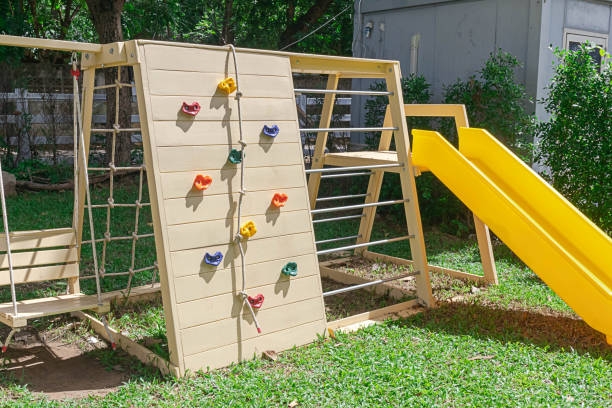
Step 2 Designing a Fun and Safe Structure
Once we've a plan, it's time to suppose about design. Then's where creativity meets practicality. We want a structure that's instigative but also safe. Slides, swings, climbing ropes, and small castles are classics for a reason — they work. But mixing it up with a sandbox, a mini gemstone wall, or indeed a shadowed reading niche can turn a simple play structure into an each- day adventure spot. Safety should always be at the van, so be sure to probe proper distance between swings, the right height for climbing walls, and soft wharf accoutrements like mulch or rubber mats.
Step 3 Choosing Accoutrements Wisely
Now, let’s talk accoutrements . Wood is generally the go- to because it's sturdy, fairly easy to work with, and blends nicely with nature. Cedar is particularly popular because it resists spoilage and bugs, which is a lifesaver when we suppose about stormy seasons or summer humidity.However,pre-cut timber accoutrements are available — they can be a huge time- redeemer and reduce the chances of miscalculations, If we're looking to save some time and plutocrat. For the audacious among us, scavenging for leftover wood from other systems or indeed using old pallets can be botheco-friendly and budget-friendly. That's where a bit of DIY home enhancement effectiveness hacks come into play — we can reclaim accoutrements , reduce costs, and still make commodity magical.
Step 4 Building Step by Step
Building the structure is the delightful part, but it's also where tolerance pays off. We start with a solid foundation — position the ground, anchor posts duly, and double- check measures. Step by step, piece by piece, we see the vision come to life. And yes, we will make miscalculations — perhaps a board is slightly off or a screw goes missing but that's part of the process. kiddies frequently enjoy helping too, whether it's holding a board, passing tools, or adding their own particular traces.
Step 5 Enjoying Your vicinity Creation
Eventually, once the DIY play structure is over, take a moment to stand back and respect it. It's further than just a playground it is a creation born from planning, cooperation, and a little bit of trial and error. And the stylish part? Watching the kiddies run, climb, swing, and laugh in the space we erected with our own hands.
So, is it worth it? Absolutely. With careful planning, thoughtful design, and a many clever effectiveness hacks, creating your own vicinity play area is n't just realizable it is a satisfying adventure. After all, there's nothing like a little hard work turned into endless fun for the kiddies.
