

How To Setup Roomba?: Step-by-Step Guide.
The first-time setup of your Roomba can be great fun as it signifies the start of a home that is both cleaner and smarter! With this Roomba setup guide, you will get help in each and every step of the process, whether you just bought a brand-new machine or are reconnecting an old one.
1. Charge and unpack your Roomba
First of all, unpack your Roomba and remove all the packaging materials. The charging dock should be placed on a flat surface against a wall with around 1.5 feet of space on each side. Plug the Roomba into the dock to charge it. A full battery is needed for the first use, and that usually takes two to three hours.
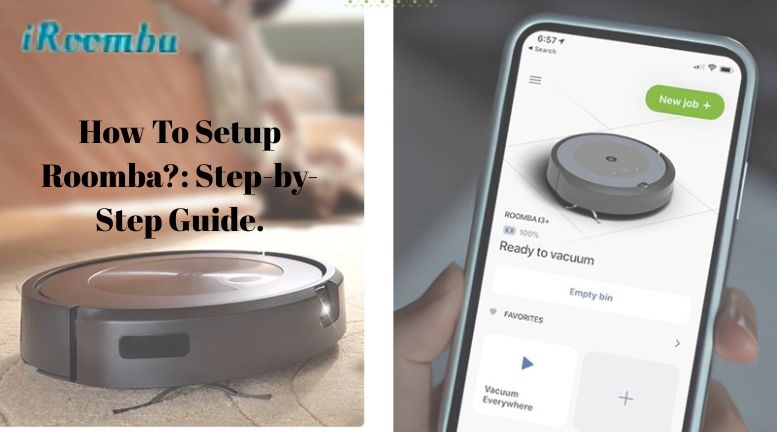
2. Get the iRobot Home App.
Next, download the iRobot Home app from Google Play (Android) or the App Store (iOS). The majority of your Roomba setup, including Wi-Fi connection and cleaning schedules, happens via this app.
Open the app, create an account, or if you already have one, go through the Roomba login steps. The app will help you connect your Roomba to your Wi-Fi network by detecting nearby devices automatically.
3. Link the Roomba to the Internet
Once you’ve signed in, connect your Roomba to Wi-Fi by the app’s guidance. To ensure a perfect connection, both the robot and the phone should be on the same 2.4GHz network. The setup is complete when the Wi-Fi indicator light is solid and the Roomba chime sounds.
4. Start Cleaning
After the setup is done, you can clean the first time from the app or just press the "Clean" button. In case of linking with Google Assistant or Alexa, voice commands can be used even for scheduling and setting up cleaning preferences.
5. Roomba Resetting and Troubleshooting
The reset Roomba process should be tried if it is not responding or cannot be connected. To switch off the lights, keep the "Clean" button pressed for approximately 20 seconds, then release it. This way, your gadget is reset, but the stored data remains intact.
For further information, please visit our website.
